
The Basics of LOD and How to Create it in UE5: For Low-end PCs
Updated: Jun. 16, 2026
Published: Jun. 11, 2026
Update History
Jun. 16, 2026: Added a note to “Explaining Overdraw”.
What is LOD? (Level of Detail)
Section titled “What is LOD? (Level of Detail)”LOD is a feature that allows you to adjust an asset’s resource usage appropriately based on its size on screen.
It mainly provides the following benefits:
- Reduces vertex processing load
- Avoids overly dense rendering
Is Nanite Optimization Friendly?
Section titled “Is Nanite Optimization Friendly?”Nanite is a system designed for rendering massive numbers of polygons, but optimizing it for low-end hardware can be extremely difficult.
The base cost required to run the system itself also cannot be ignored.
By using familiar, classic LOD meshes instead, you can keep resource control more manageable and help avoid various resource shortages that often occur in the later stages of a project.
The most important thing is to perform stress/load testing early in development.
The upper limit you need to stay within depends on the title requirements and the target platforms.
Environment production has so many conditions to consider that accurately estimating the appropriate amount of resources from the very beginning is almost impossible.
Once you have built a scene that represents the final production environment, first create a packaged build for a console or for the lowest-spec target platform, and measure the performance load.
We strongly recommend doing this before entering the mass-production phase.
If the results show that the Nanite load is too high and cannot be used on the target platform, you will need to create the scene using non-Nanite meshes.
Then, if the scene built with non-Nanite meshes still shows a high vertex processing load in your measurements, that is where LOD comes in.
If the vertex processing load is within the expected range, LOD is not necessary.
Why write a document about LOD in 2026?
Section titled “Why write a document about LOD in 2026?”If you already use LOD in your regular workflow without any issues, and you fully understand it, close this page and return to your game.
Several years have passed since UE5 was officially released, and the number of developers who have never had to deal with LOD has increased.
Since LOD meshes are still effective for low-end PCs and consoles, We decided to organize this knowledge again.
Classic LOD meshes are not something you simply finish after creating the base mesh. In almost all cases, you will need to spend time adjusting the LODs.
That production cost seems to have become a problem in actual development.
So, let’s look at what kinds of problems occur and how they can be improved.
The Importance of Camera Perspective
Section titled “The Importance of Camera Perspective”Games use several different camera systems.
Top-Down
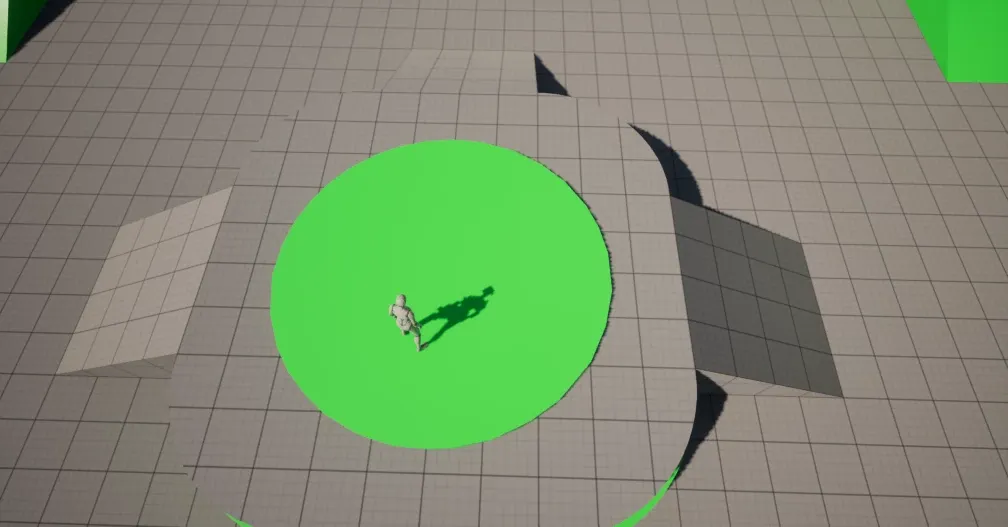
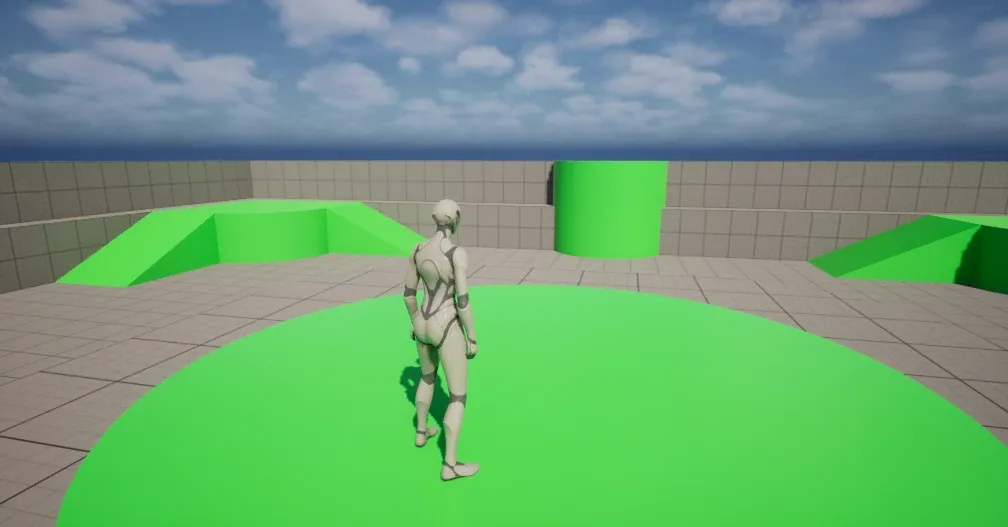
Section titled “Top-Down”This perspective is well suited for conveying the size and scale of the stage or scene.
Since the camera is facing downward and mainly showing the ground, it is not so good for showing the horizon or sky.
A top-down perspective makes the character’s position very clear.
Assets outside the screen can be prevented from rendering through frustum culling.
Since the Screen Size also remains fixed, LODs are probably unnecessary.
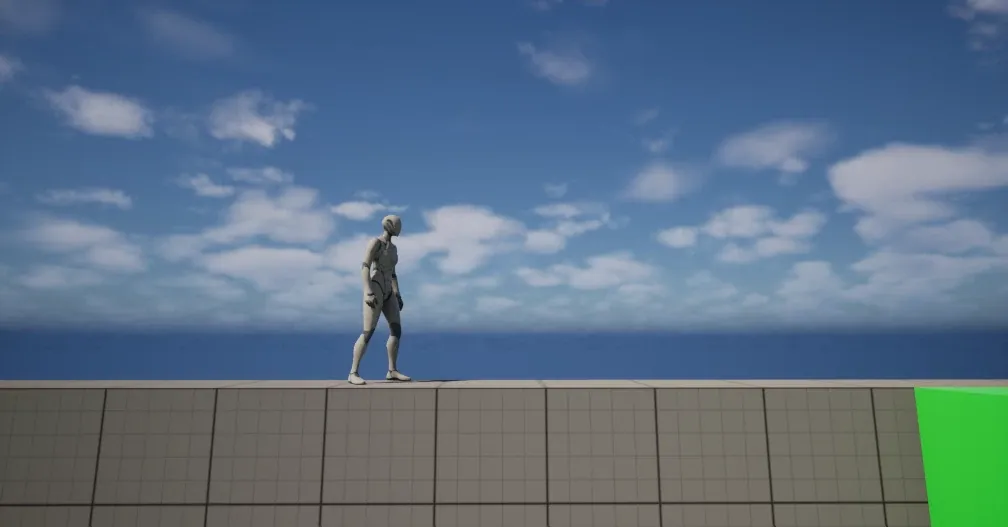
Platformers
Section titled “Platformers”This uses a camera that scrolls horizontally.
As with a top-down view, the assets rendered on screen are limited.
Unless the camera moves forward or backward, the Screen Size does not change, so LODs are not necessary.
3D Perspective
Section titled “3D Perspective”This refers to the typical TPS/FPS perspective, where a strict perspective is drawn toward the depth of the screen.
It can create visuals close to reality, including not only the nearby ground but also the distant horizon and sky. This makes it the camera type most suited to creating rich, high-end visuals.
Because it can render scenery far into the distance, the amount of rendering cost placed on the screen can become enormous.
In the distance, assets should be simplified, while the area near the character should appear rich and detailed. For this reason, creating LODs is essential.
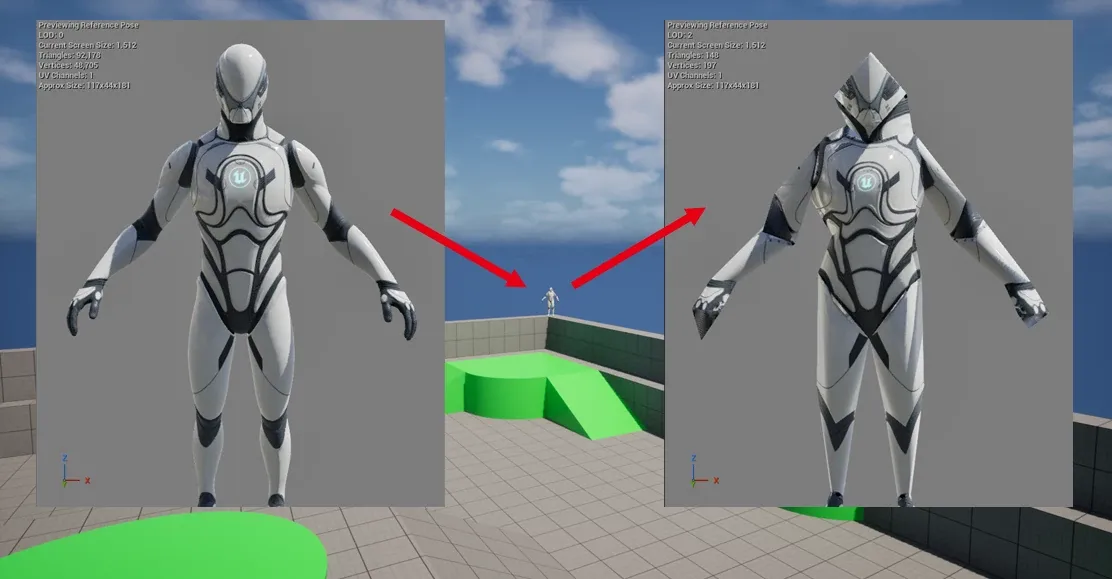
Screen Size
Section titled “Screen Size”This is often misunderstood, but distance is not what determines LOD.
LOD is judged purely by how large the asset appears on screen, using Screen Size.
Two enemies are approaching!
Section titled “Two enemies are approaching!”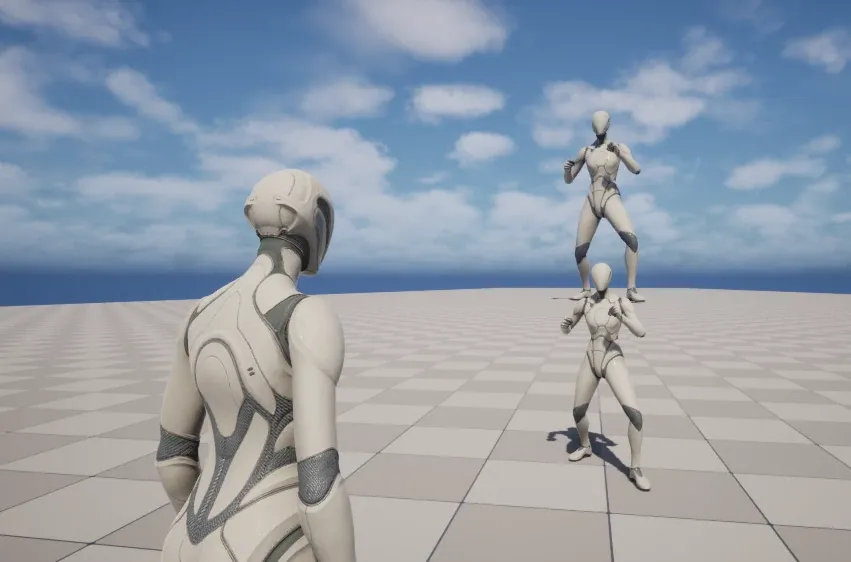
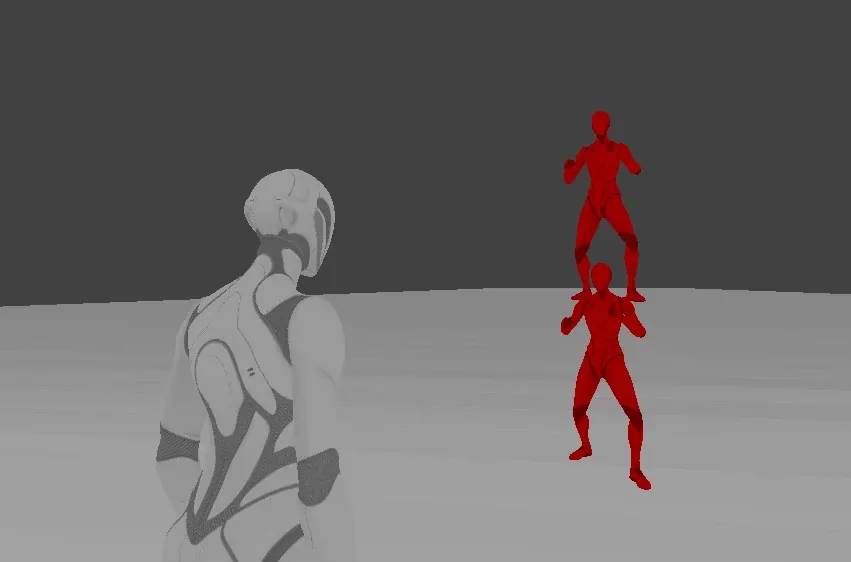
Switching the viewport mode to Mesh LOD Coloration to check the actual LOD state.
You can see that both enemies have turned red, confirming that they have switched to LOD1.
Actual Size and Position
Section titled “Actual Size and Position”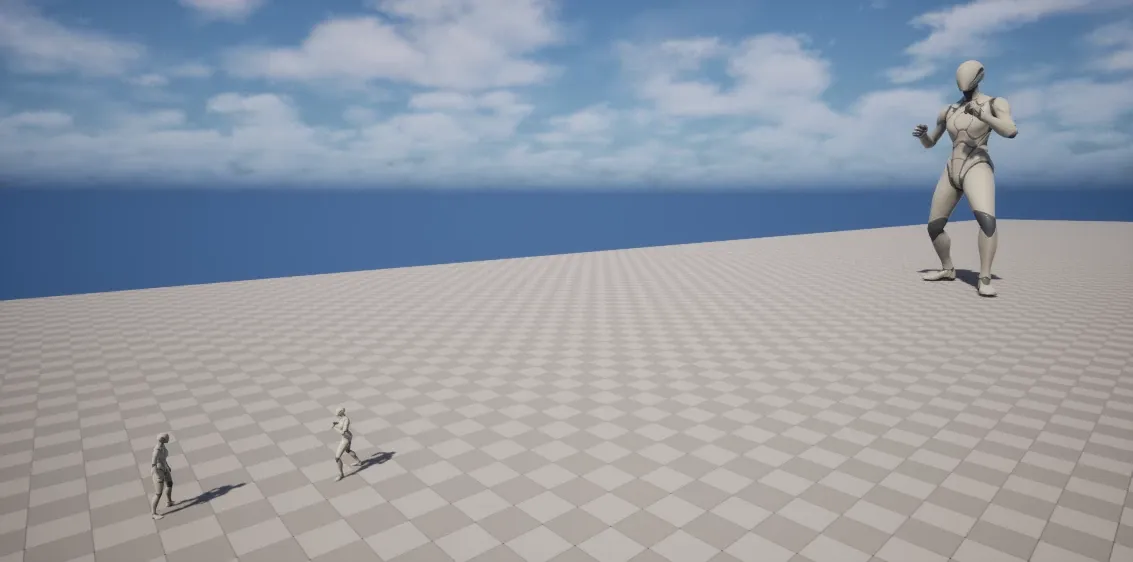
Now switching the camera to a top-down view.
In reality, there was this much difference in the enemies’ actual size and distance.
LOD can only be judged by the size on screen, in other words, by Screen Size.
Explaning Overdraw
Section titled “Explaning Overdraw”Polygons that overwrite the same area are a waste of processing.
Also, as shown in the image below, only the portions that cover more than half of a pixel are rasterized.
Because of this, sending small polygons into a Draw Call increases the vertex processing load.
One of the purposes of using LOD is to adjust the rendering density within the screen.
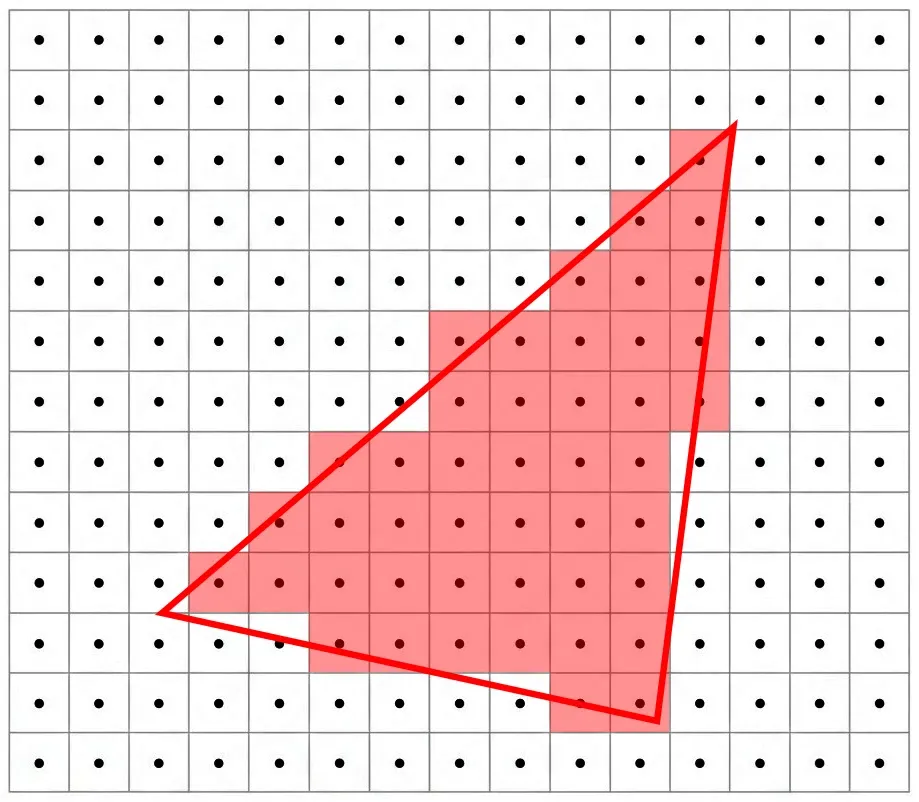
(*Note: Added on June 16, 2026)
*In some cases, overdraw may not occur due to the Top-Left Rule.(Rasterization Rules - Win32 apps)
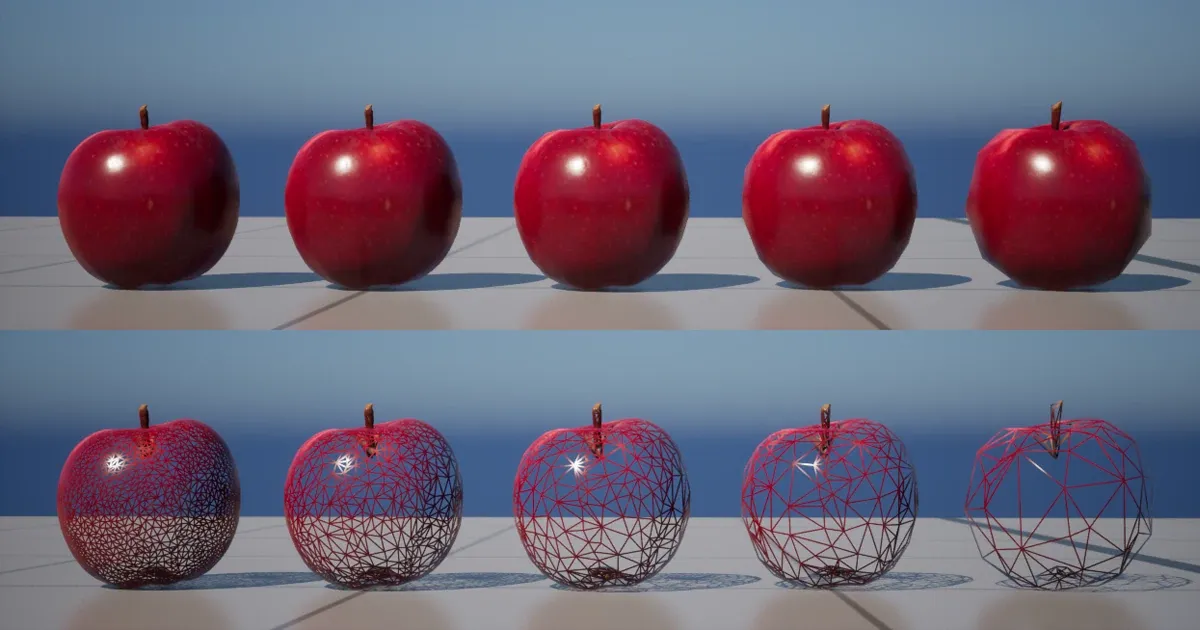
Comparison with and without LOD: Left = No LOD / Right = With LOD
Section titled “Comparison with and without LOD: Left = No LOD / Right = With LOD”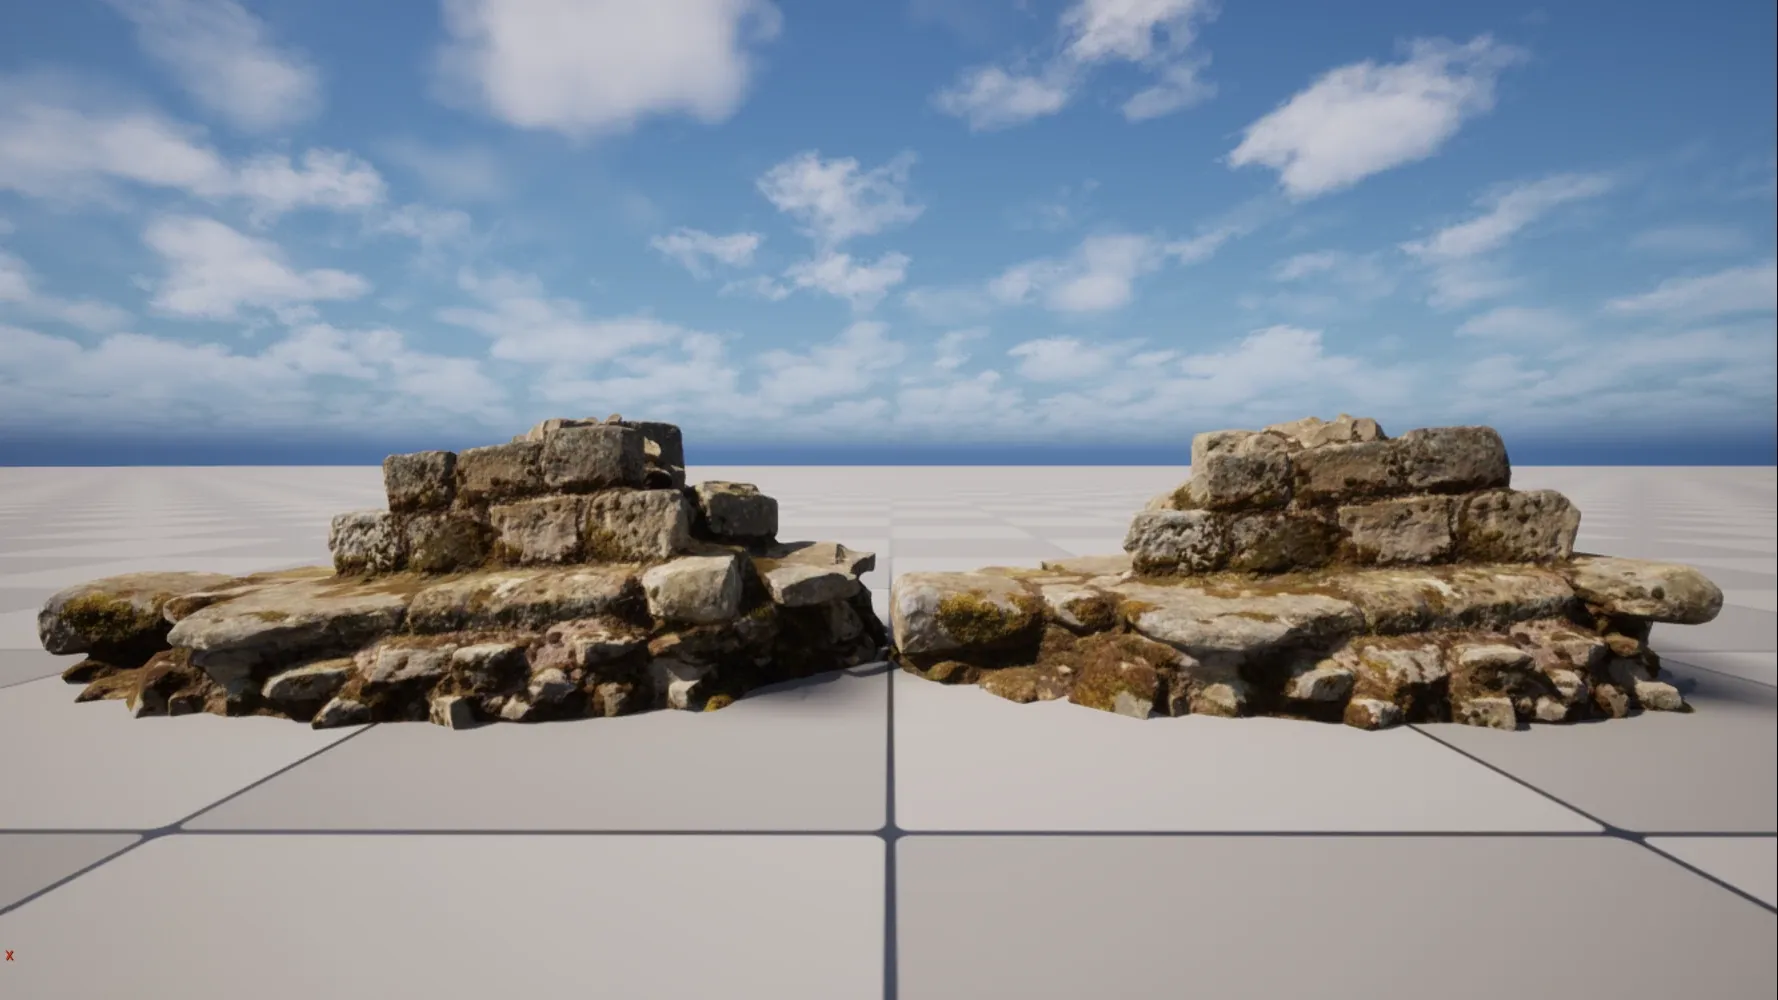
A state where the camera is pulled back and the vertices are dense
Section titled “A state where the camera is pulled back and the vertices are dense”
Even if the asset looks the same in the foreground, the difference in vertex density becomes clear as the camera moves farther away.
Naturally, the asset on the left, which has no LOD, has a higher rendering cost.
During Rendering, Multiple Pixels Are Output at the Same Time
Section titled “During Rendering, Multiple Pixels Are Output at the Same Time”The smallest unit of output is a 2x2 pixel called Quad.
Depending on the architecture, 16x16, 32x32, or 64x64 pixels may also be handled as a single unit.
Rendering tiny polygons that only output a single pixel when multiple pixels could be processed simultaneously is highly inefficient and a bottleneck for GPUs.
*The same applies to long, thin polygons.
Comparison video: Left = No LOD / Right = With LOD
Section titled “Comparison video: Left = No LOD / Right = With LOD”How to Actually Create LODs
Section titled “How to Actually Create LODs”Use Unreal Engine’s built-in features for asset reduction.
The only things you adjust manually are the number of LODs and the Screen Size values.
You can also manually adjust the triangles, but tuning multiple parameters for each LOD mesh takes time.
For that reason, we leave vertex reduction to the automatic process.
Creating Stages of LODs
Section titled “Creating Stages of LODs”For each LOD stage, we will reduce the asset’s cost by half.
As an example, imagine a mesh with 10,000 polygons.
Set up 5 LOD levels, and make the farthest LOD mesh as low-cost as possible.
| LOD | Polygons | Screen Size |
|---|---|---|
| LOD1 | 5,000 | 0.8 |
| LOD2 | 2,500 | 0.6 |
| LOD3 | 1,250 | 0.4 |
| LOD4 | 625 | 0.2 |
Ideally, the settings would look like the above.
Procedure for Version: 5.6.1
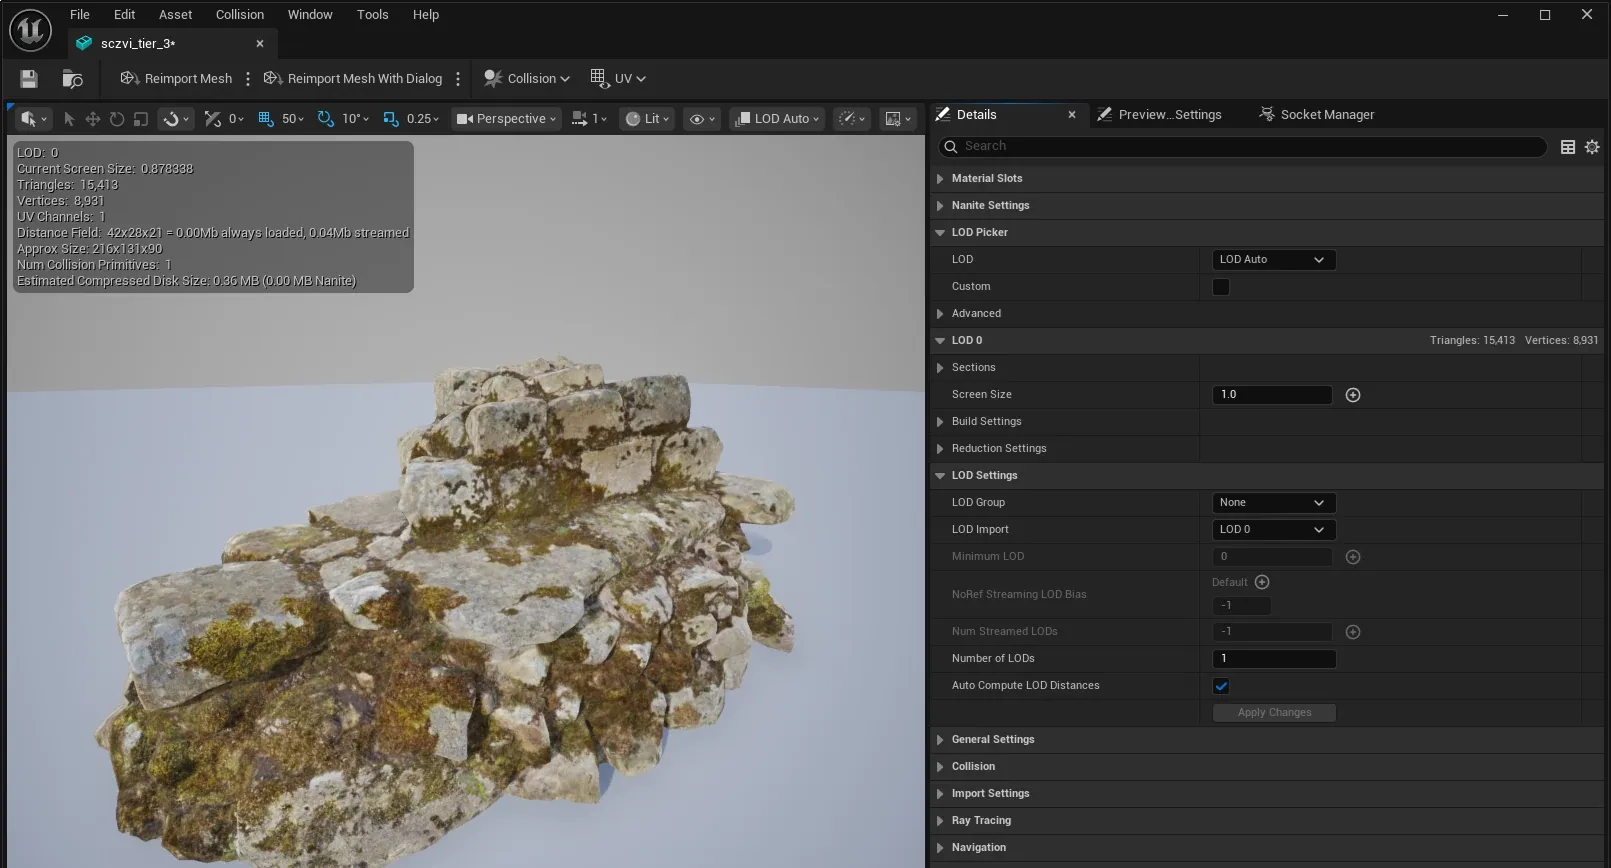
Section titled “Procedure for Version: 5.6.1”Setting Details
Section titled “Setting Details”1. Uncheck Auto Compute LOD Distances
Section titled “1. Uncheck Auto Compute LOD Distances”This allows you to manually override the Screen Size for each LOD level.。

2. Enter any desired number in Number of LODs
Section titled “2. Enter any desired number in Number of LODs”In this sample, we enter 5 to generate four new LOD stages.

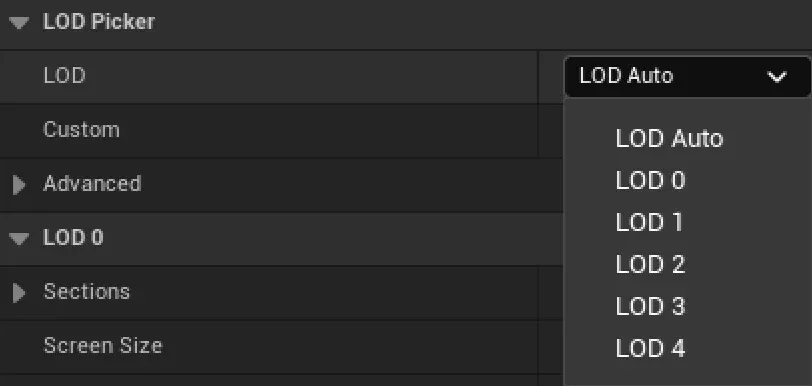
3. Adjust Screen Size
Section titled “3. Adjust Screen Size”Use the LOD Picker to switch between and select each LOD. Then we enter the values mentioned above into the Screen Size field for each LOD.

You can make adjustments using LOD Group presets, but they will not produce the best results when environment assets vary greatly in shape and complexity.
Natural objects such as rocks, grass, and trees, objects such as signs and traffic lights, and large buildings all have very different characteristics depending on the situation.
If you can categorize each asset in detail, then using LOD Groups may become viable. However, by the time that is possible, the project will probably already be in its final stages.
In game development, you want to make things as lightweight as possible, so the best practice is to process each asset carefully and individually.
Checking the LODs
Section titled “Checking the LODs”After setting the Screen Size values, move the camera forward and backward in the editor to check how the LOD transitions occur.
If you want to see the exact transition state, switch to Mesh LOD Coloration.
Next, place the asset and check it there.
If possible, walk around the actual game field.
Because the behavior changes depending on the aspect ratio, We recommend checking at a resolution as close as possible to the final production environment.
Mesh LOD Coloration in the Viewport
Section titled “Mesh LOD Coloration in the Viewport”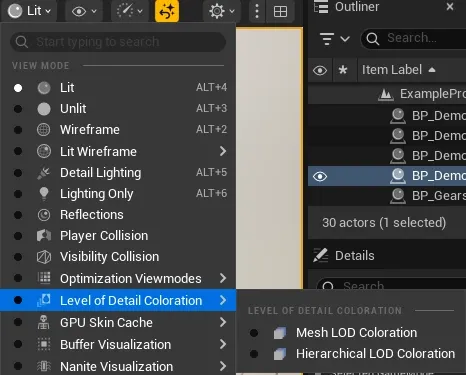
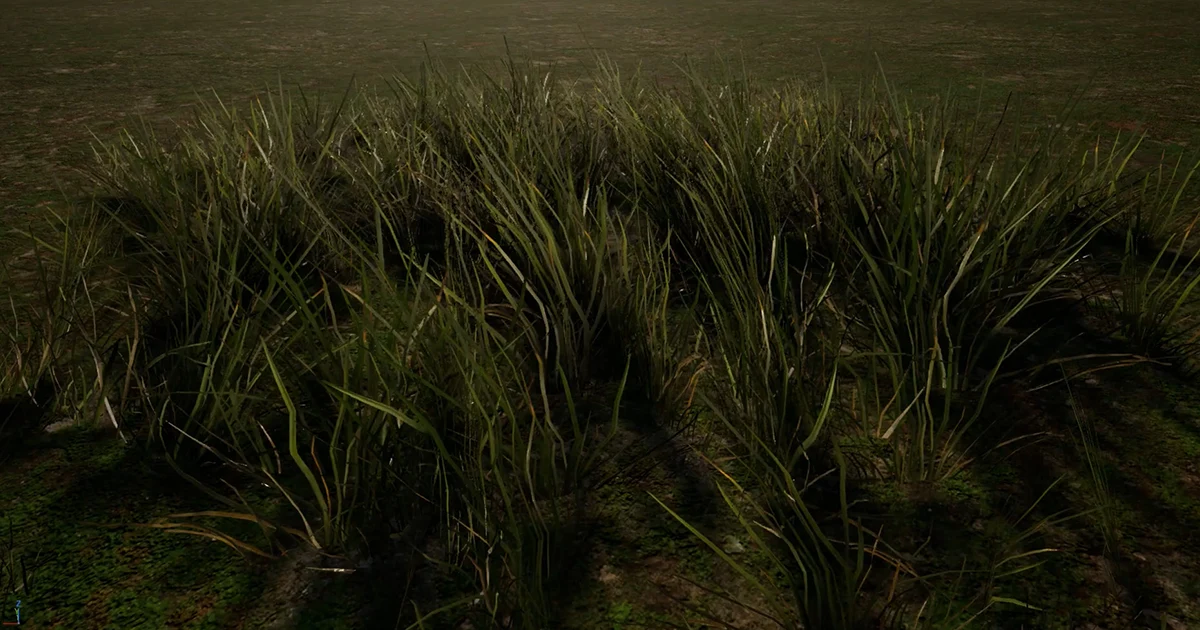
Asset Vertex Count x Placement Count = Total On-Screen Cost
Section titled “Asset Vertex Count x Placement Count = Total On-Screen Cost”Weeds and pebbles.
Both in reality and in game worlds, they are often seen as insignificant. However, they occupy a large portion of the screen and play a major role in defining the world’s visual identity. From an optimization standpoint, they are among the most important asset groups.
This is because they are placed in such large quantities that they can cover the entire ground.
Vegetation, in particular, tends to be layered on top of itself, which makes overdraw more likely to occur. Combined with vertex processing load, this makes vegetation difficult to handle in two different ways.
Houdini Placement View
Section titled “Houdini Placement View”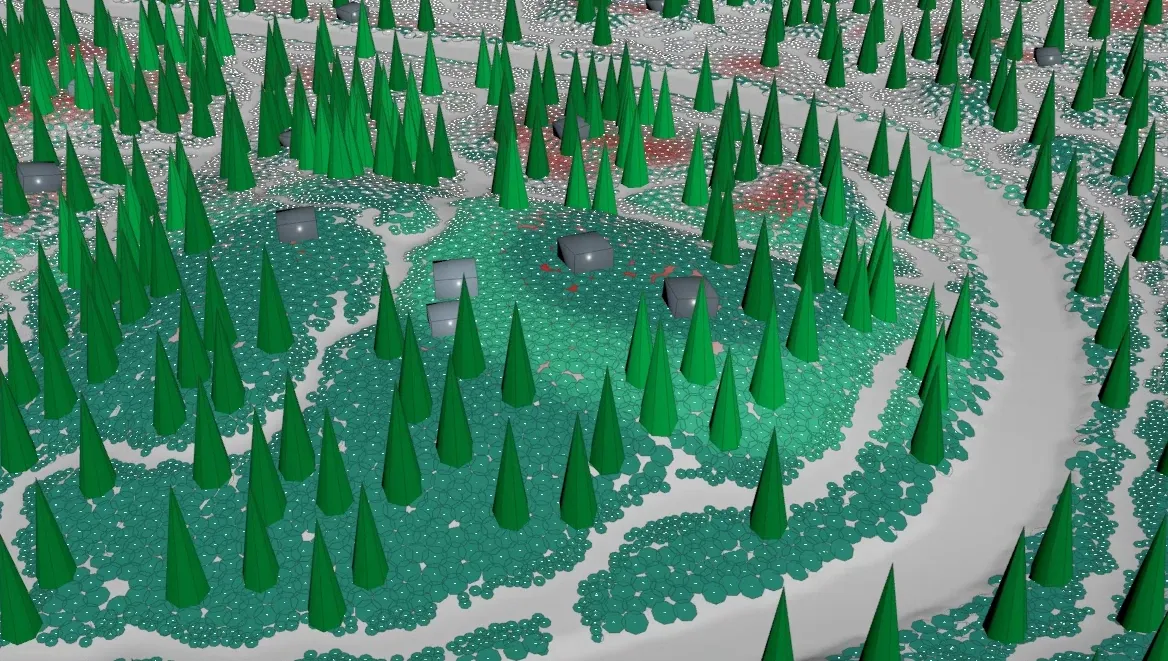
A Single Model Containing Parts with Different Density Levels
Section titled “A Single Model Containing Parts with Different Density Levels”When reduction is applied to a mesh with significantly different polygon densities, the result tends to be pulled toward the high-density areas, making the low-density areas more likely to collapse.
This is especially noticeable with trees.
For that reason, you need to use techniques such as generating LODs separately for each element, then merging them again afterward.
This can also be done in DCC tools, but in Houdini separating and merging parts is easier.
WinterCrownWORKS: Comparison of individual reductions and combined leaf and stem reductions
Section titled “WinterCrownWORKS: Comparison of individual reductions and combined leaf and stem reductions”The Fear of “Popping”
Section titled “The Fear of “Popping””Have you ever had this experience?
As the character runs through a field, assets suddenly appear ahead, their shapes change dramatically, or they suddenly disappear.
Assets across the screen keep switching back and forth, popping in & out, breaking your immersion while playing.
For designers, it is also terrifying to see assets they spent so much time creating change inconsistently as the camera moves.
The thing most hated by both players and developers is popping. In or out.
However, if adjusted properly, you do not need to worry about it too much.
During gameplay, many kinds of information are moving on screen, so players rarely focus closely on a single asset.
If the game is fun, there is nothing to worry about!
Now, let’s look at how to address it.
How to Reduce Popping
Section titled “How to Reduce Popping”Increase Stages of LODs
Section titled “Increase Stages of LODs”Assume that an asset with many vertices is set up with 3 LOD stages.
If we exclude LOD0, which is the base mesh, there are only two reduced stages: LOD1 and LOD2.
This can cause sudden poppings.
If you lower the Screen Size value to avoid popping, the LOD transition happens later, which reduces the benefit of mesh reduction and defeats the purpose of setting up LODs in the first place.
If necessary, prepare 5 or more LOD stages to soften sudden changes.
As a general guideline, use 1-3 stages for low-cost assets, and 7 or more stages for assets with detailed geometry.
Decide the number of LOD stages based on the asset’s shape, complexity, and importance.
5 LOD stages
Section titled “5 LOD stages”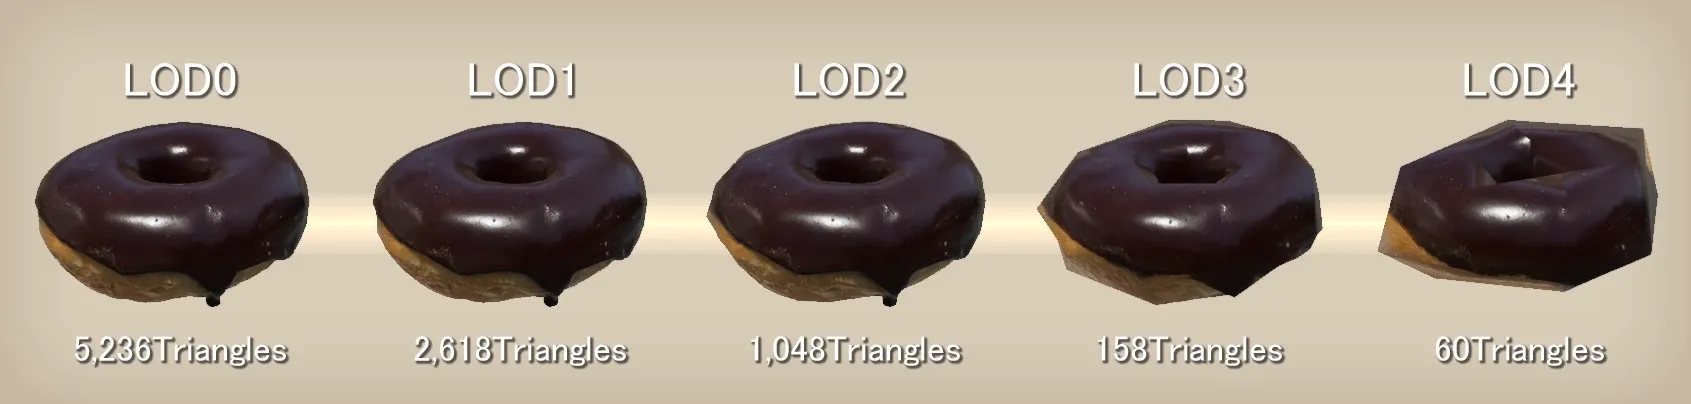
3 LOD stages
Section titled “3 LOD stages”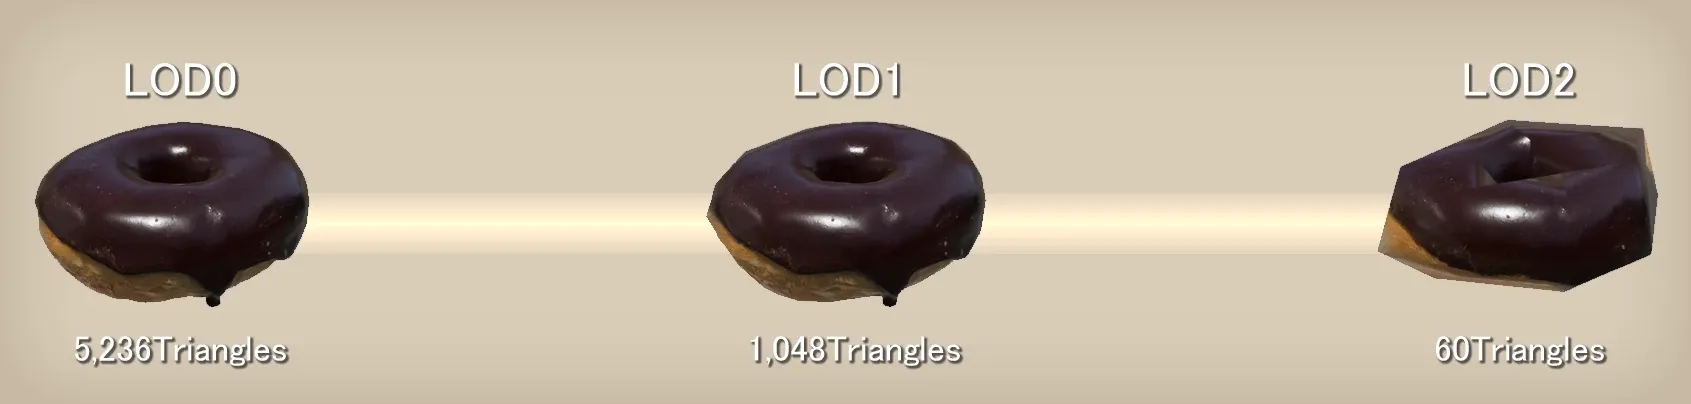
“Cards” Are Difficult to Reduce
Section titled ““Cards” Are Difficult to Reduce”UE’s built-in reduction tools struggle with reducing separate, strip-shaped cards.
Examples include animal fur and plant leaves.
LOD2: The trunk is broken
Section titled “LOD2: The trunk is broken”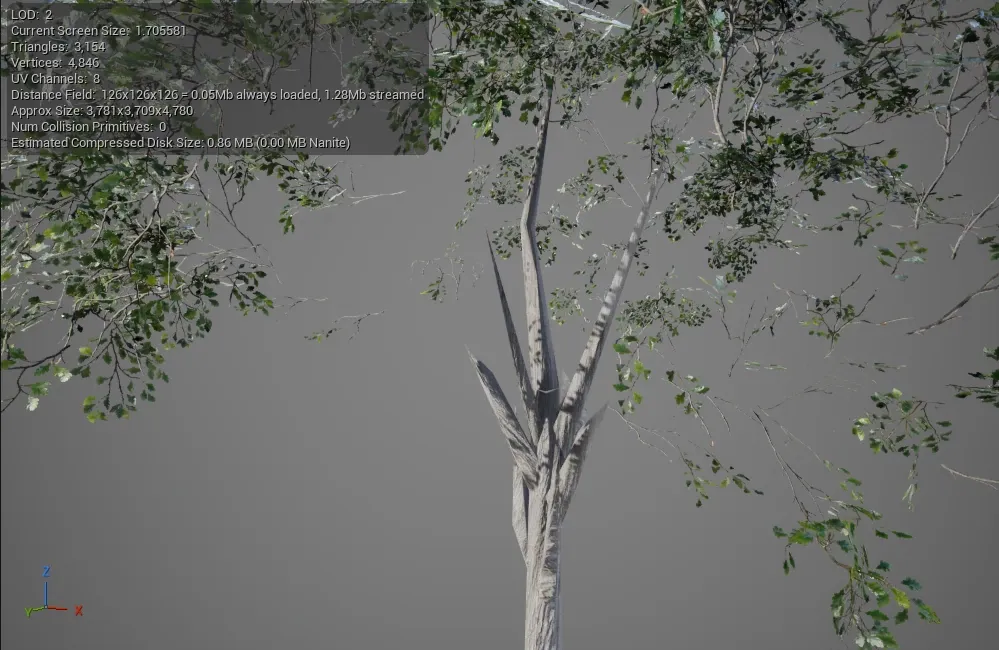
Using SpeedTree
Section titled “Using SpeedTree”SpeedTree is a dedicated tool for vegetation.
Its LOD adjustment features are also powerful, allowing you to finely tune the reduction ratio for each individual element.
If you want to create vegetation efficiently, it is definitely worth learning.
LOD2: Each element has been reduced in a well-balanced way
Section titled “LOD2: Each element has been reduced in a well-balanced way”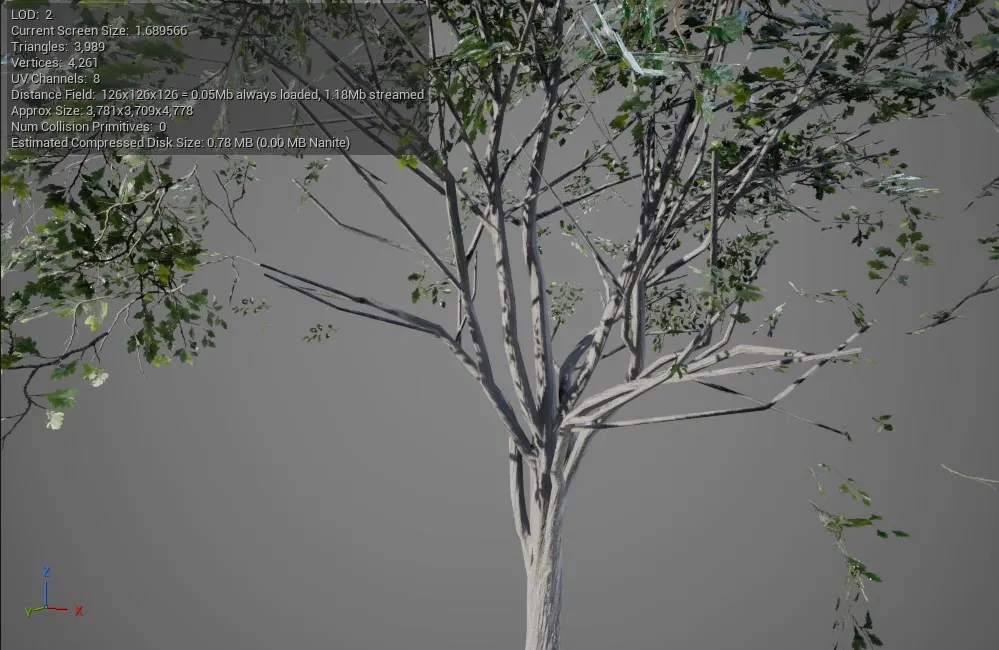
Using Dither LOD Transition
Section titled “Using Dither LOD Transition”In a previous demo video, we showed transitions using Masked materials, but this can also be used with Opaque materials.
By making the transition appear smoother, you can reduce popping. In addition, because you can set the Screen Size larger, you can reduce vertices more aggressively.
Comparison video: Left = normal LOD / Right = with Dither LOD Transition
Section titled “Comparison video: Left = normal LOD / Right = with Dither LOD Transition”Collapse in the Farthest LOD
Section titled “Collapse in the Farthest LOD”The farthest LOD mesh is rendered at a distance, so do not worry too much if it is slightly broken.
If you absolutely need to preserve the shape while reducing performance cost, one option is to create the LOD asset in a DCC tool, then import it externally into UE and register it as the farthest LOD mesh.
References
Section titled “References”Between Tech and Art: The Vegetation of ‘Horizon Zero Dawn’
Section titled “Between Tech and Art: The Vegetation of ‘Horizon Zero Dawn’”
Adventures with Deferred Texturing in Horizon Forbidden West
Section titled “Adventures with Deferred Texturing in Horizon Forbidden West”
BroadLeaf:Real-Time Cinematic Rendering
Section titled “BroadLeaf:Real-Time Cinematic Rendering”
Rasterization Rules - Win32 apps
Section titled “Rasterization Rules - Win32 apps”